Showing posts with label tutorial. Show all posts

Thursday, January 28, 2016

winter sewing and winter sowing


I'm craving spicy arugula greens drizzled with olive oil and freshly-squeezed lemon juice and a generous sprinkling of coarse sea salt. Doesn't that sound so good? I never think about or even use arugula that much during the spring, summer or fall, I only want it when it's not growing in my garden. Probably a winter-related nutritional deficiency. Sewing with green and yellow on the January moon helps.


My calendar designates Thursdays as when to practice the Law of Intention and Desire by making a list of desires. It says that inherent in every intention and desire are the mechanics for their fulfillment. I think of a seed or bulb containing everything it needs to germinate, grow and flourish.


Be discerning when making a list or choosing seeds to plant. These tiny seedlings are from this dandelion puff I planted. But in my case, I'm hoping for dandelion greens. In salads.


An altar table where I keep crystals, candles, feathers and other sacred objects -- since the light streams through the window above it during the winter, it becomes a green altar. This is not a place I want to be seeing too much yellow because that would mean something is off.


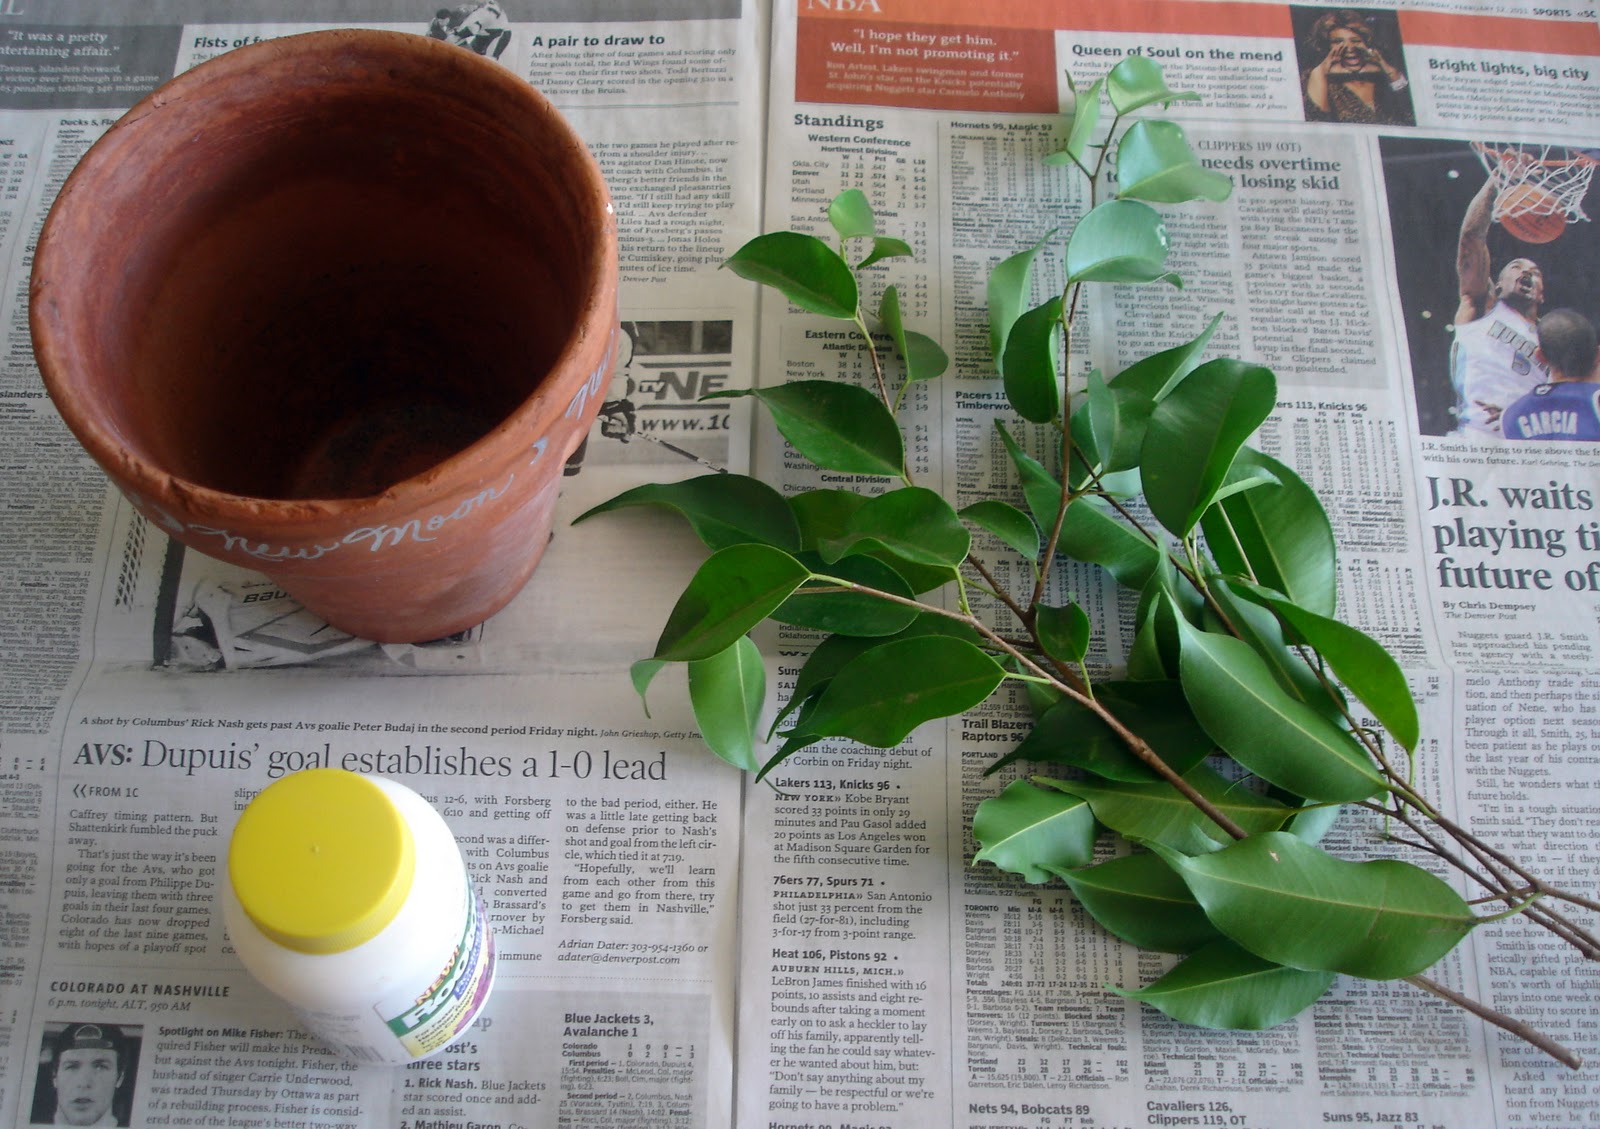
I have come upon a most interesting method of growing seedlings for the garden -- winter sowing. The basic premise is that seeds planted in small self-styled greenhouses and placed outside in the elements will germinate and grow in their own perfect time. I used plastic quart water jugs and a plastic liter bottle. I first drilled holes all over the bottom for drainage, drilled a few more holes around the top opening for ventilation and finally cut the jug in half leaving a section under the handle to act as a hinge. 


After I filled the bottom section with about 3" of soil, I moistened the soil and sowed the seeds, the same depth as when planting in the garden.


The slice around the center of the container needs to be taped back up for these cold months. I used strapping tape but plan to find some clear duct tape for the next batch. The screw top should be left off.


Labeled with a waterproof pen, these will be placed together in a plastic bin (with more drainage holes) for protection and stability. I'll put the bin on a back-yard table top out of reach of the four-leggeds. In a few months when tiny seedlings begin to emerge, they'll need a closer eye. At the point when temperatures rise or when the soil dries out, the tape can be removed and the top half flipped open for sun/baths. Winter sowing is to be done in January, February and March, depending on your zone. And lastly, I mostly followed the directions from herehere and here.

The Law of Intention and Desire ends with trusting that when things don't seem to go your way, there is a reason. 

And I would add that things have their own perfect time. xx


Wednesday, September 12, 2012

design board


Last week I finally got around to making a design board for the sewing room. I started out with a 4' x 8' foam insulation board, cut down to 48" x 76" to fit the space. White side down, I laid it onto 90" wide Warm & White textured batting, trimmed a 4" border around the sides, and then stapled all around. Lastly, lengths of duct tape cover and stabilize the staples. I pretty much followed Oh, Fransson's instructions.

Then I put three nails one foot apart into the wall and just pressed the board against them to hang it. For now, flying dreams, is up. I'm so glad to see it up again -- it had become too big to tape onto the wall anymore. I haven't sewn on this for quite a while because I felt like I needed to see all the pieces together before continuing. It definitely feels like an autumn/winter cloth.

A design board is ding-dang wonderful, as Nancy once said.


Thursday, July 7, 2011

smudge stick

I like to burn all kinds of incense and sometimes I use a smudge stick. Smudging is a way to change how a space feels or to purify a person's aura. It's also thought to be a way for hope and prayers to rise. Using herbal plant material from my own garden and making it myself adds another element to its meaning.


This morning, I collected a big bouquet of lavender and garden sage because that's what grows here. I tried growing the traditional white sage, Salvia apiana, but it didn't work out, so it's back to regular S. officinalis from the garden. A single stem of mugwort, Artemisia vulgaris, was added for visions and dreams, and sweetgrass, Hierochloe odorata, to carry hopes and prayers in its smoke.


After inverting half the lavender, the mugwort and sweetgrass were placed in its center. I'm only using the one stem of mugwort because too much can actually cause disturbing dreams. I once had some mugwort bundled and drying near my bed and this was learned from personal experience. The truth.


Next I inverted half the sage and placed the stalks all around the lavender bundle. It was bound with a cotton string looped at one end for hanging and bow-tied at the other end for tightening. It's a dry climate here so it could be wound pretty tightly. In high humidity with mold potential, I would leave it much looser and tighten as it dries.

To make a loose incense to burn on a charcoal disc, dry the herbs thoroughly, break them up a little and mix together. I do like the feel of a smudge stick in my hand though!

Thursday, March 24, 2011

amazing ficus

I'm itching to start digging and planting full-force in the garden, but it's a tad too soon here in Colorado. That's OK though because there's still plenty to do indoors with the Green Nation. My houseplants can definitely use a little TLC about now --  each one needs a shower in the kitchen sink, a haircut, a top-dressing with new soil, and a few dog food nuggets snuggled down a few inches in the soil. Yes, dog food -- as it decays, it releases its nutrients -- just make sure your dog doesn't see you do it! Or you could use diluted fish emulsion, but dog food doesn't smell.

This was a recent houseplant project. The goal was to root these ficus cuttings from a friend and pot them close enough to braid as they grow. I started out with four in case one didn't take.

Some people evidently don't use rooting hormone with ficus, but I had never rooted it before so figured I needed all the help I could get, plus we already had some. Moistened each cutting and dipped it into the rooting hormone.

Poked holes in the potting soil with a pencil and placed the powdered stems in the holes. Then I watered the whole business and placed it in a low-light situation. And forgot about it except when I watered it along with other plants. No special treatment whatsoever.

Six weeks later, I noticed new growth. So out came the fourth cutting and the first braid was begun. Amazing ficus!

Do you feed houseplants anything unusual? I'm collecting ideas.

Wednesday, March 9, 2011

by clementine candlelight

Last night we had dinner by candlelight. Clementine candlelight, that is.

I saw a video yesterday over at Apartment Therapy . . . basically you score around the middle of the clementine peel, loosen and gently remove the sections, leaving the core intact. The core is the wick. Pour a little olive oil in and light the core/wick. It doesn't need to dry out or anything, just hold a match to it until it lights.  Carve a little opening in the other half if you want a lid on it.

We liked it better with the lid off so we could watch it burn. It lasted  for 1 ½ hours!

  
  A lot of mileage out of one cutie!

Tuesday, February 15, 2011

greencraft: mousepad makeover


A mousepad makeover . . . don't laugh.

 One of the kids had an attachment to our Three Stooges mousepad so it moved out when
he did. This is what we've been using. It was time for a change.

I traced and cut out the full-moon shape, then sanded it lightly to take any
shiny off. Found some bright cotton in stash and again cut out a circle
but about an inch larger all around.

Went outside with the pad, the cotton, spray glue and a pizza box
from a birthday party the night before.

        Trimmed around the edge with a sharp scissors.


                             Love it.                       

Wednesday, February 2, 2011

"this isn't bad"

                                                                                                                                                                                                brigid's fire

As you may recall, yesterday I had myself a little Brigid ritual in which I burned some old plant matter. I put last year's dream pillow, some dried lavender, comfrey stalks, etc. into an iron cauldron. It was in the zero degree range outside and windy -- I couldn't keep a fire going so I impulsively put in a stub of beeswax candle and the fire took off. It took off so nicely it wouldn't stop burning and I was cold; so I set the cauldron by Buddha out in the garden and came back into the house. Well, it's just never comfortable with something burning unattended so I went out a few times to check on the fire and take a picture. I didn't wear a jacket the last time out so was in a hurry and did I mention, it was cold and icy?

The next thing I knew I was in the air. Ascension! I arose and was held in space for a nanosecond and I kid you not, had the thought "this isn't bad" and then boom on my butt and my wrist. Never one to stay down for long, I checked the still-burning fire, and ran -- not learning my lesson at all -- back to the house straight for the arnica. (Arnica is the homeopathic first-aid remedy to treat bruising.) Slathered a thick coating of comfrey salve on my wrist, took a hot bath with about 1/4 cup of lavender oil added, then slathered more comfrey salve on the wrist, more arnica, and I'm good this morning.

And so lucky that it wasn't bad.

I attribute the entire episode to cosmic forces and to Brigid, the goddess of healing and inspiration. The very dried-up plants I burned were among the ones that I turned to for healing, comfrey and lavender. A reminder that the most common plants in my garden are deeply healing, even on the first day of February. I take them for granted sometimes.

                                                                                                             the last jar of comfrey leaf salve

This episode inspired me to use something else from my garden that I take for granted, dried chili peppers, to make a pain-relieving capsicum oil this morning. Just to have on hand as I seem to have need for such things lately -- plus I've never used it and want to try it out. Today is also the new moon (in Aquarius) making now the perfect time to make herbal preparations to be strained at the full moon in two weeks.

                                                           slightly crushing dried chili peppers

Capsicum sp. is good for joint and muscle pain, increases circulation and is generally warming, as we all know. Some people apply it to their hands and feet before going outside into cold temperatures. It can be made with a tablespoon of cayenne powder from your spice bottle added to a cup of olive oil. I made mine with some wicked-hot dried chili peppers. So hot that I used only four of these tiny peppers to about three-quarters of a cup of olive oil. It has been capped tightly and will infuse on a protected surface (in case of oozing) in a dark cupboard until the next full moon; if it's not hot enough, more peppers can be added -- if it's too hot, more olive oil. The oil can be strained and used as is or made into a salve. Salve-making is very easy -- heat a cup of the infused oil with just under an ounce of beeswax until it melts, then pour into small container. Don't cap until it sets completely. If it comes out too stiff, simply reheat adding more oil; too runny, add more beeswax. This oil is for external use only.

Warning:  Keep hands away from eyes after making or applying!

                                                                                                      capsicum oil

Turmeric and I have a dye-date later today to meet up with a old cotton produce bag, a mini-skein of wool yarn, and at least one old & stained t-shirt. What will happen?

Thursday, January 27, 2011

honey honey

Yesterday my hands had so many rough spots that I was constantly getting caught on my sewing -- threads clung to me like velcro. I suppose it would've been the same with certain yarns. This happens to me a lot. Oh my gosh, I can't believe I never thought of this before. I feel like I've discovered cheese in my sheep bladder milk vessel (they say that's how cheese got started in case you're wondering there).

honey sugar scrub!

This is the easiest recipe ever. The sugar exfoliates at the same time the honey moisturizes.  As I was mixing this up with my hands, instead of with a spoon as I normally would, the roughness was completely smoothed and when I went to sew, there was no clinging action. I even picked up strips of frayed silk! Nada. The crazy part of this is now I remember reading about using sugar scrubs on the hands to soften them but didn't connect the dots far enough. For some reason I guess I thought only gardeners needed a sugar scrub for their hands but now I see that stitchers need it as much, if not more!

In making this, I had a January craving for a citrus fragrance so used grapefruit, lemon & bergamot orange essential oils, but anything goes. Just the honey alone smells good enough to eat. But don't because both the almond oil and the essential oils are for external use only. I had to catch myself as I was about to lick it off my fingers.

Here's how.

 Items needed: Sweet almond oil, honey, sugar, essential oils.

  Add 1 1/2 cups sugar to 1 T. sweet almond oil in a ceramic/glass
bowl -- work it in with your hands. 
                                       
 A little at a time, add about 1 1/2 cups honey, again working it in
with your hands, until it's a smooth paste.

Stir in about 30 drops of essential oil.

Put it in a lidded container with a wide opening so you can get your hands in there to scoop it out.  To use in the shower, apply a small amount to wet skin in a circular motion -- some recommend sweeping upward toward your heart to encourage circulation.
Rinse off with warm water.

Store what you won't use in the next week or so in the refrigerator,
but bring it to room temperature (or try popping it in the microwave) again
before using. This should be good for a month or two, just keep an eye on it.

Now how about a little ABBA singing "Honey Honey" just a short 37 years ago!


Wednesday, January 12, 2011

greencraft: tea jars


It took over 20 years. Now that's what you call procrastinating. I first saw this in a friend's kitchen way back, probably when Celestial still made Mo's 24, do you remember that? I am absolutely flabbergasted at how much I love this.  It's orderly, much easier to get a teabag, and the tea stays fresh. And you can see when you're running low. It costs basically nothing and saves money in the long run -- in fact, I shudder to think how many tea bags have gone to the compost. Sort of like composting dollar bills.

greencraft: tea jars

Here's how it began.

  Assorted boxes of tea, some probably growing old and stale
because, you know, that happens when you don't close the box just right.

      Gather jars -- these are former almond butter jars and a few quart jars.

                        Remove the tea bags from the box, then remove inner bag carefully --
                             save it because this can be reused for all kinds of food storage.
 
Cut the top of the box or whatever part shows the type of tea it is.

 This will be your new jar label

   Cut out and tape the ingredient list on the backside of the new label,
    you just know someone'll be allergic to something or you'll need to prove it
does or doesn't have caffeine!

 Insert label into jar, fill with tea bags and screw on top.
One down, many to go.

The inner liners are actually great for food storage -- they're food-safe, after all.
The photo shows cookies, but I've been mostly keeping opened-cheese packages in them,
that way the bags don't need much cleaning, although they can be
quickly rinsed or wiped out.

 The boxes can be recycled or stashed, notice the beautiful pattern
on the inside of one box -- I'm saving that.

Organized tea cupboard, every jar with fresh tea bags!

Also posted at Food Renegade's Fight-Back-Friday.

Thursday, January 6, 2011

ice flower dyeing

About a month ago, I tried out "ice flower dyeing" -- described in Eco Colour by India Flint as a way to draw better color from fragile flower petals.  Earlier in the fall I had collected various flower petals from the garden, placed them in freezer bags by type and color, and then into the freezer. Red geranium (pelargonium) flower petals were first up. The good thing about using geraniums is their flower petals can be collected even now if you're overwintering a plant in the house.

cloth to be dyed: cotton, silk & linen

            bag of frozen red geranium petals

 quickly place the flower petals into a muslin bag with drawstring top

 bag of flower petals, quart glass jar of lukewarm water with 1/2 t. alum for mordant, cloth

 immerse the bag all at once into the warm water . . .

 after a few seconds . . . breathtaking!

mash the bag with a wooden spoon to release even more color . . .

immerse cloth into jar of dye-bath, then let steep for however long you'd like.
this is the plant the flowers are from. 
the black dog is daisy and the brown dog is talula. 
daisy likes to sit "at table" on the window seat but not at mealtimes!

At this point the cloth is still in the dye-bath and it looks pink.
My next step is to heat the dye-bath, then iron the cloth, and lastly place in vinegar water.
All to see what will happen!